Pumpkin Playground Maps
Nineteen stages—from quiet workshops to lava, sea, and the Moon—and how to pick the right one.
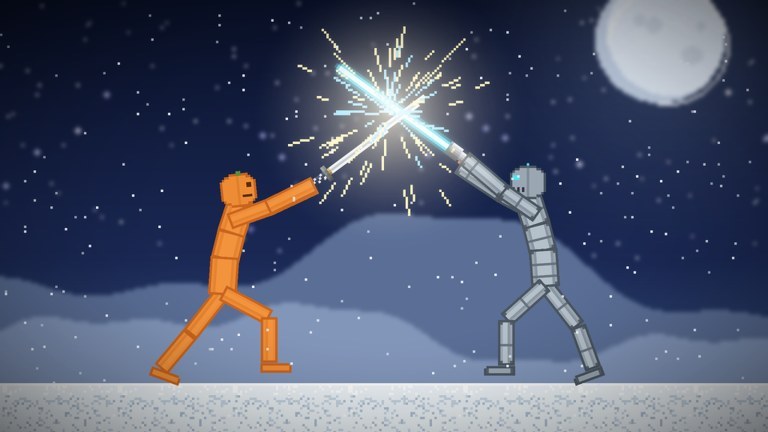
Pumpkin Playground spreads its chaos across nineteen maps. Official blurbs highlight a spectrum from a quiet workshop to lava, the sea, and the Moon, plus ready-made houses, towers, and bunkers you can occupy or demolish. This overview groups those environments by play intent so you spend less time loading the wrong biome for the session you wanted.
Map choice matters as much as loadout. A Cluster Bomb on a workshop slab is a lesson; the same bomb inside a wired bunker gallery is a social incident. Pair this page with Getting Started, Items and Weapons, Powers, and Building and Wiring.
How to think about the 19-map roster
Rather than invent unofficial names for every slot, treat the roster as overlapping families:
- Workshop / studio floors — Neutral lighting, readable physics, ideal tutorials.
- Residential and vertical structures — Houses, towers, multi-floor play.
- Hardened structures — Bunkers and defensive shells.
- Hostile element maps — Lava and other heat-forward stages.
- Fluid maps — Sea and water-heavy arenas.
- Low-context spectacle maps — Moon and other wide-open horizons.
- Mixed specialty stages — The remaining maps that blend the above for variety.
All nineteen exist to reframe the same toys: pumpkin people, 300+ items, eleven powers, and wiring. When patch notes add or refresh a stage, check the Updates Hub.
Workshop and quiet studio maps
Start here. Workshop-style maps give you flat ground, clear sightlines, and fewer environmental killers. They are the correct home for:
- First-hour controls practice.
- Battery–motor–light prototypes.
- Fair melee and gun comparisons.
- Learning Cluster Bomb timing before you touch a Pumpkin Nuke.
Tips
- Mark a “chaos half” and a “gallery half” with pasted walls so six players can coexist.
- Keep heat view (
T) ready even here; player-made fire still spreads. - Save builds often—workshop comfort can make you forget until a friend earthquakes the lab.
Houses and towers
Prefabricated houses and towers add vertical stories, furniture clutter, and roofs begging for meteor showers. They shine when you want narrative scenes: raid the attic, defend the stairwell, drop a car from the third floor.
Tips
- Copy a clean interior before you invite explosives.
- Guns beat nukes for room-to-room play.
- Earthquake tests whether your pasted reinforcements actually help.
- Spawn pumpkin people on multiple floors for staggered limb comedy under slow-mo.
Towers punish spindly wiring. Brace motors vertically or keep circuits on lower floors.
Bunkers
Bunkers are denser, more defensive shells. They are excellent for siege loadouts (guns, tanks, small bombs) and terrible for surprise gravity flips if everyone stored unique machines inside one room.
Tips
- Assign corners to builders in co-op.
- Use lights generously; bunkers eat visibility.
- Park vehicles outside until you need the battering ram.
- Announce powers. A tornado in a bunker is a blender.
If you redeemed BOOM, bunker testing belongs on a copied disposable shell—not the shared gallery.
Lava maps
Lava stages weaponize heat. Fire and temperature are already first-class systems in Pumpkin Playground; lava maps make them constant. Great for survival machines and dramatic ragdoll disposals. Poor for first wiring lessons.
Tips
- Heat view on by default.
- Build on stone-like safe pads when the map provides them.
- Expect cars and loose props to become sacrifices quickly.
- Combine with meteor shower only when you accept total resets.
Bring extinguishing or isolation strategies if the catalog offers them; otherwise design sessions as short scorched-earth vignettes.
Sea maps
Sea arenas emphasize water, splash debris, and flotation weirdness. Acid and electricity become nastier when fluids connect systems you meant to keep separate.
Tips
- Test buoyancy with pumpkin people before you motorize a boat-like contraption.
- Keep batteries on elevated platforms.
- Gravity flip plus sea water is advanced chaos—fun, but copy everything first.
- Nukes look spectacular; recovery time is longer because debris sinks and scatters.
Sea maps are ideal “second biome” picks after workshop mastery.
Moon maps
The Moon is spectacle space: wide horizons for UFO reveals, long car jumps, and readable meteor silhouettes. Vertical comedy changes with the map’s gravity feel—take a minute to fling a dummy and learn the arc before you stage a tank jump.
Tips
- UFO and meteor shower photograph well here (Powers).
- Wide open space reduces accidental bunker grief.
- Wiring still works; dust off simple pads instead of ornate towers until you know the jump distances.
- Great for content clips after you redeem code explosives from the Codes Hub.
Specialty and mixed maps
The remainder of the nineteen fill gaps: tighter obstacle yards, alternate interiors, or hybrid hazard spaces. Explore them with a fixed protocol so you learn each stage instead of bouncing randomly:
- Load the map.
- Fling one pumpkin person; note arcs.
- Place a battery-light pair; note environmental pressure.
- Fire one small explosive.
- Decide whether the map is for building, combat, or pure chaos.
- Save a build if the stage deserves a return visit.
Matching maps to goals
| Goal | Map family | Avoid at first |
|---|---|---|
| Learn controls / wiring | Workshop | Lava |
| Room clearing with guns | Houses / bunkers | Moon (too open) |
| Vehicle stunts | Moon / open workshop | Dense bunkers |
| Heat stories | Lava | Your only saved machine |
| Fluid + flip experiments | Sea | Uncopied wiring |
| UFO / meteor cinema | Moon / towers | Crowded grief lobbies |
| Code nuke showcase | Open workshop or Moon | Shared bunker gallery |
Co-op map etiquette
With a server size of 6, map preference is a group vote. Rotate: one round workshop builds, one round bunker siege, one round Moon powers. Players who ignore the vote and meteor the build hour will find lobbies emptying—even in a game with millions of visits and busy concurrency peaks.
Use pause before world events. Paste backups on far corners. Redeem codes on your account before the session (How to Redeem Codes) so you are not AFK in STORE while others load the Moon.
Performance and platform notes
Dense bunkers plus tornado plus tanks on mobile can stutter. If you play on phone or tablet, prefer open workshop or Moon for power showcases, and save the heaviest stacks for PC. Controls differ by input device but map goals stay the same—see Controls.
Suggested tour for new players
- Workshop — Getting Started checklist.
- House/tower — melee and gun readability.
- Bunker — co-op siege without nukes.
- Sea — fluid lessons.
- Lava — heat view final exam.
- Moon — powers and UFO night.
- Remaining specialty maps — one per session with the six-step protocol above.
Nineteen maps are a playlist, not a checklist to rush. Pick the stage that matches your toys, protect the builds that matter, and let pumpkin physics do the rest.
Frequently Asked Questions
Quick answers for Pumpkin Playground players.
How many maps does Pumpkin Playground have?
Nineteen, ranging from quiet workshop stages to lava, sea, and Moon environments, plus houses, towers, and bunkers.
Which map should beginners use?
A workshop-style map with clear floors and low environmental hazard. Learn grab, pause, and wiring there before lava or sea.
What are bunkers and towers good for?
Vertical combat, sieges, and stress-testing builds. Copy interiors before you invite earthquakes, meteors, or nukes.
Why use heat view on lava maps?
Lava adds constant temperature pressure. Heat view (T) shows when fire threatens batteries, motors, and pumpkin people.
Best map for UFO or meteor clips?
Moon or other wide-open stages show silhouettes clearly. Towers also work when you specifically want collapsing roofs.